Spring Boot comes with a built-in mechanism for application configuration using a file called application.properties. In this article, I’ll show you how to effectively use the application.properties file in custom scenarios.
I’m not going to discuss properties specified by the Spring Boot framework. Working with existing configuration keys is pretty straightforward. You can easily find common keys in the official documentation.
This post covers defining custom properties, handling data types, and working with properties on different runtime environments. If that’s what you’re looking for, keep on reading.
Advertisement
- application.properties basics
- Defining your custom properties
- application.properties by environment
- Conclusion
application.properties basics
The application.properties file is nothing more than simple key-value storage for configuration properties. You can bundle the configuration file in your application jar or put the file in the filesystem of the runtime environment and load it on Spring Boot startup.
In brief, you can use the application.properties file to:
- configure Spring Boot framework,
- define your application custom configuration properties.
Creating application.properties in default location
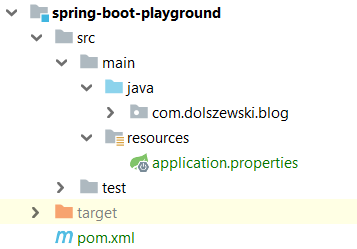
Spring Boot loads the application.properties file automatically from the project classpath. All you have to do is to create a new file under the src/main/resources directory.
The application.properties file is just a regular text file. Each line contains a property key, the equals sign, and a value of the property. Blank lines are also allowed.
Here is a sample property:
sbpg.init.welcome-message=Hi there!
You may wonder if there is any specific syntax for property keys. The answer is: no, there isn’t. However, it’s a good idea to keep the naming convention proposed in the predefined Spring Boot properties to improve the readability of the file.
Under those circumstances, you can think about the keys as fully qualified Java class names. You build up a key from several parts split by the dot sign. The last part of the key should describe the purpose of the property. You use other parts to logically group several properties.
Injecting properties with @Value
Once you define your first custom property, you’re ready to use it inside your Spring beans. You can simply inject a property value using the @Value annotation. The annotation works in bean constructors and directly on bean fields.
The @Value annotation accepts the key of the property you want to inject as:
- a property placeholder (${…})
- an expression (#{…}).
In general, expressions are much more powerful and besides property dereferencing you can use them to do many other things. Let’s keep it simple for a moment and use the property placeholder. Here is how you inject the value of a property via bean’s constructor:
@Service
class InitService {

   private final String message;

   InitService(@Value("${sbpg.init.welcome-message}") String message) {
       this.message = message;
       log.info(message);
   }
   // ...
}
By the same token, you can use the annotation directly on the field. However, it makes the unit testing harder and can lead to a very common issue. I’ll describe the problem later so you can form your own opinion.
@Service
class InitService {

   @Value("${sbpg.init.welcome-message}")
   private String message;
   // ...
}
If Spring doesn’t find the key you want to inject, it’ll throw IllegalArgumentException when trying creating the bean.
Default property value
By default, a missing property causes an exception. But, it doesn’t have to. You may decide to make an optional property. When the key is missing in the application.properties file, you can instruct Spring to inject a default value for a property key.
How to do this?
You need to modify the expression by adding a colon (:) after the property key followed by your default value. Here is an example:
@Value("${sbpg.init.welcome-message:Hello world}")
Why my @Value is null?
It’s a common problem amongst Spring newcomers. Let’s discuss the following bean which uses the field injection mechanism.
@Service
class DontDoItService {

   @Value("${sbpg.init.welcome-message:Hello world}")
   private String message;
   // ...

   InitService() {
       log.info(message); // prints: null
   }

}
What is wrong in this code?
The author of the code doesn’t understand that Spring injects values to fields of a bean after the bean is created. And the bean is created using the constructor, right? When you think of it that way, it’s pretty obvious. You can’t assign a value to a field of an object which doesn’t exist yet.
In other words, the code in the constructor is executed first. The injection happens next. That’s why the constructor injection is safer.
Comments in application.properties file
In addition to properties and blank lines, the application.properties field may contain comments. To comment a line, just put the hash character at the beginning of a line.
#The init message logged at the startup
sbpg.init.welcome-message=Hi there!
You can comment only whole lines. Hash characters in the middle of a line are treated literarily. Technically, you can use the hash character as a part of a property key or a value.
Defining your custom properties
Up to this point, we only discussed plain string properties. Now we’ll look into other data types. I’ll also show you a few useful tricks you can use in the expressions.
Basic property types: string, integer, boolean
Since application.properties is a text file, all defined values are strings. Yet, the Spring framework is smart enough to automatically cast string values to other types if you try injecting value to a non-string variable.
Here is a sample with number and boolean literals:
sbpg.init.number=42
sbpg.init.display-number=true
To inject these values you use the same expression as for string values. Spring detects variable types and casts your properties to appropriate primitives.
InitService(@Value("${sbpg.init.number}") int number,
            @Value("${sbpg.init.display-number}") boolean displayNumber) {
    if (displayNumber) {
        log.info("Magic number: {}", number);
    }
}
You can also inject properties to primitive wrapper classes like Integer, Boolean, BigDecimal, or even your custom enums. No extra work required from you.
Multiline string property
If you have a very long property value, you may consider breaking it into several lines to improve readability. You break lines in the application.properties file using the backslash character.
sbpg.init.welcome-message=Hi there! This value is pretty long \
 and that is why I decided to \
 break it into multiple lines
Notice that the injected value doesn’t contain the new line characters.
Property as arrays, list, or set
Some properties in your application may define a collection of values. In this case, assign to your desired property key a list of values separated by the comma.
sbpg.init.numbers=0,1,1,2,3,5,8
Again, Spring does the conversion for you. Just inject the property into an array variable.
InitService(@Value("${sbpg.init.numbers}") int[] numbers) {
   // ...
}
Collections like lists and sets work exactly the same. If the value of the property contains duplicates, only a single element will be added to a set.
InitService(@Value("${sbpg.init.numbers}") List<Integer> numbers) {
   // ...
}
Custom separator for list properties
By default, Spring splits your property by the comma. There is no way to escape comma. What should you do if you want another separator like the semicolon?
sbpg.init.numbers=0;1;1;2;3;5;8
Fortunately, you can split the property on your own using a different separator. All you need is a simple expression.
InitService(@Value("#{'${sbpg.init.numbers}'.split(';')}")
            List<Integer> numbers) {
   // ...
}
What is going on here?
Spring injects the property as a regular string. You indicate it with the single quotations marks. Next, inside the expression (#{…}), the split() method of the String class is called on the injected value. Finally, Spring puts the result into the list.
Alternatively, you can inject the property as a regular string and split it on your own. You should decide what is more readable for you.
Property as hashmap
Injecting maps is a little bit more tricky than arrays and lists. Let’s start with the format of the value that you should use in the application.properties file.
sbpg.init.number-map={KEY1:1, KEY2:2, KEY3:3}
The map literal looks almost as JSON. The only difference is that quotation marks are not required. You can wrap keys and values into quotation marks if you like. Spring will unwrap them for you.
The final step is to inject the property using the @Value annotation. In order to do so, put the property placeholder inside the expression. Without the expression, Spring will throw IllegalStateException.
InitService(@Value("#{${sbpg.init.number-map}}")
            Map<String, Integer> numberMap) {
   // ...
}
Naming convention for custom properties
As I already mentioned, property keys resemble fully qualified Java class names. It’s not mandatory but a logical grouping of connected properties improves readability. At the beginning of a project, it might seem redundant. However, projects grow and the number of properties increases. Keep your properties organized.
In my experience, it’s also a good idea to use some kind of a prefix for all your custom application properties. It’s easier to distinguish them from the built-in Spring properties. Especially Spring Boot newcomers appreciate this approach.
Usually, projects have some acronyms of their names. You can use it as the first part of your custom property keys. To demonstrate this approach, I put sbpg In all examples from this article which stands for Spring Boot PlayGround.
application.properties by environment
We don’t keep the application configuration in a separate place only for clarity. Usually, we run our applications in several different environments. We have our local machines used for development, test environments, and finally the production server. Usually, the configuration of our application should differ in each of these environments.
You have several options to tackle this problem. Let’s see what Spring has to offer.

Using environment variables in application.properties
The simplest thing you can do is to use good old environment variables from your operating system. Spring allows you to put environment variables inside the property placeholder directly in the application.properties file or in the @Value annotation.
sbpg.init.java-home=This is Java path: ${JAVA_HOME}
Spring interpolates the value at runtime and replaces placeholders with the actual values from your operating system.
What is more, you can set the default value for missing variables just like with other placeholders:
sbpg.init.java-home=This is Java path: ${JAVA_HOME:Undefined JAVA_HOME}
Profile specific configuration
Another approach is to bundle all possible configuration files inside the jar and instruct the application which one it should load at the startup. The easiest way to implement this approach is by using Spring profiles.
How to do this?
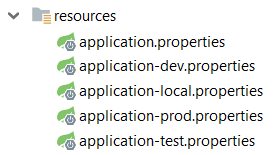
Start by creating additional files with properties in the same location as the main application.properties file. File names should follow the pattern application-<profile>.properties where <profile> should be replaced by your selected profile name.
Next, fill the files with appropriate configuration properties. You can leave the common part in the main application.properties file. Spring Boot won’t load other files unless you tell the framework to read them.
The final step is to activate the chosen profile on the desired environments. You do this by setting Spring Boot property called spring.profiles.active. You have two options here:
- set spring.profiles.active in application.properties
- set spring.profiles.active as a startup argument
Which one is better? It depends, how you prepare your deployment package.
Option 1. Separate jar package by environment
If you prefer to build a package separately for each environment, you can set the active profile in the application.properties file during the build process.
spring.profiles.active=dev
Your build process needs to replace the value of the spring.profiles.active property for each environment it targets as a part of the build. Maven also has the concept of profiles which is commonly used to separate builds for different environments. You can instruct Maven to dynamically replace values inside application.properties and set the active Spring profile.
Option 2. Single jar package for all environments
If you follow Jez Humble recommendation from his Continuous Delivery book, you deploy exactly the same package to all environments. In this case, the values of the spring.profiles.active property in application.properties will only act as the default profile.
Next, you should pass the spring.profiles.active property as a regular VM option when starting your app in the runtime environment. This VM option will override the value from application.properties.
java -jar app.jar -Dspring.profiles.active=dev
If you don’t run the jar file directly but deploy your application to some servlet container, check its manual to learn how to pass VM options.
Whichever option you choose, setting the active profile will cause Spring Boot to load your desired file with environment dedicated properties.
External application.property file – Going outside jar/war
What if you don’t or even can’t put environment properties inside the jar file? For instance, we store passwords in the properties. Production credentials may be kept in secret even from developers who work on the application.
No worries, Spring Boot has a solution for you.
The framework can load a custom application.property file directly from the filesystem of the runtime environment. What you have to do is to set the spring.config.additional-location property with the directory in which the external application.properties file is placed.
java -jar app.jar -Dspring.config.additional-location="C:/myapp/path/to/config/"
If your application package contains the application.properties, Spring Boot will load properties from the external file with higher priority.
Conclusion
All in all, you should already know how to create your custom properties and work with primitive and more complex data types inside your application. Creating the application.properties file dedicated for separate runtime environments shouldn’t also be an issue for you. You already know there are a few approaches to tackle this problem.
Feel free to comment on the post or ask a question if you need more explanation. If you find the article useful, please share it with your followers. Also, consider subscribing the mailing list so you won’t miss future articles about similar topics.
One Reply to “Spring Boot application.properties file”